How to Enlarge Images in WordPress

What is the first thing that comes to mind when we usually enlarge images in WordPress taken from our phones, cameras or from a site’s gallery? Quality! But we have often come across multiple instances when a zoomed-in image loses its crispiness.
If we fail to correct this mistake, we could very well lose potential visitors for our WordPress website. Images serve as the prime welcoming tool of your site that must deliver a solid first impression in order to generate interest. It wouldn’t matter if your content writing skills are superb if the pictures are not as such.
So What Do We Do?
The remedy is to ensure that each enhanced pixel of an image is in complete harmony with the other. Hence, in order to counteract this unfortunate dilemma, I have prepared a list of the finest tips that will give your images the sharpness and clarity that they need.
Using Photoshop for Image Resizing
Let’s face it; there is no other software that enjoys image editing as much as Photoshop does. That being said, there are two tools that you can use for this job. One is Image Re-sample that enables you expand images without having them lose their quality in the process.
The other and quite frankly, the one with the better results is Perfect Resize. It is available both as a standalone software from the official website as well as a plugin for Adobe Photoshop.
Be advised that the software is rather expensive as the regular version will cost you around $50 and the premium version that comes with the plugin, will be about $150. It may be heavy on your wallet, but the results are really worth it. First, let’s have a look and see how you can resize an image with re-sampling.
Re-sampling
A quick way to do this is by re-sampling an image by 10% increments. Here’s what you should do:
- Select and open the image you wish to enlarge with Photoshop.
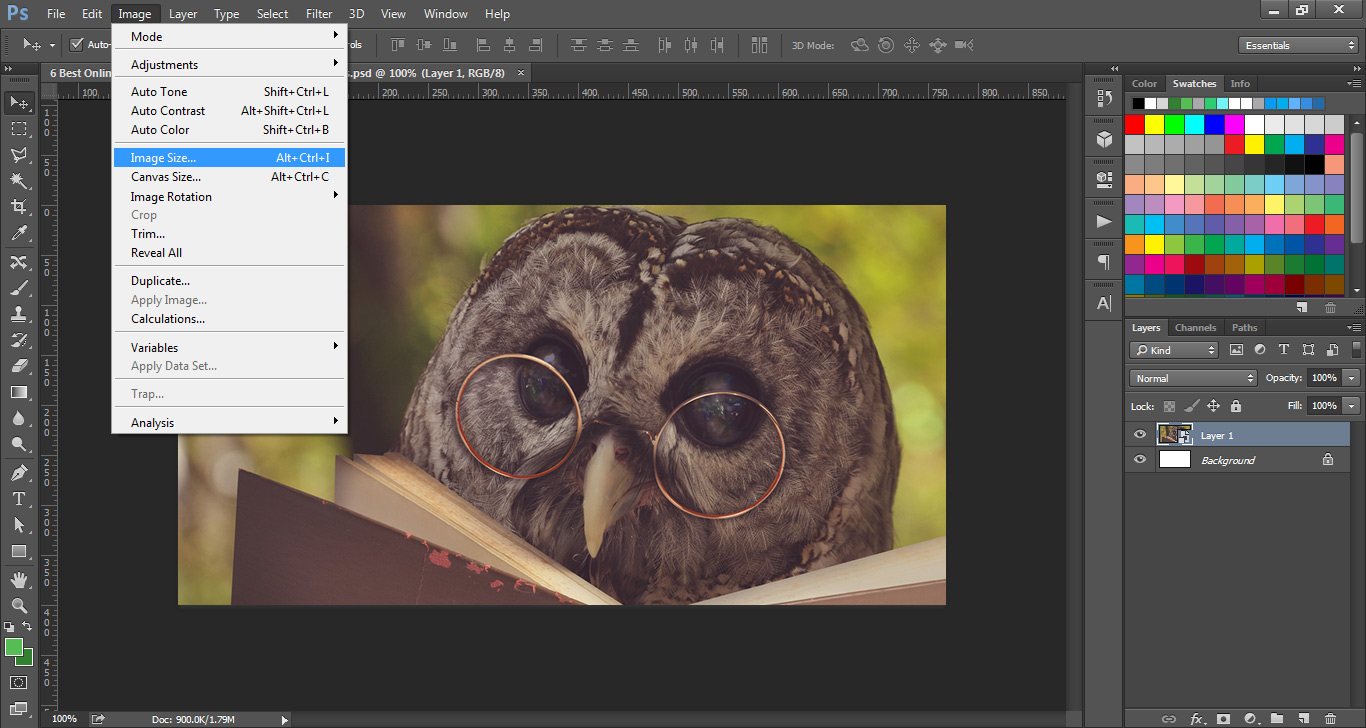
- From the application hosting bar on the top, select Image >> Image Resize.
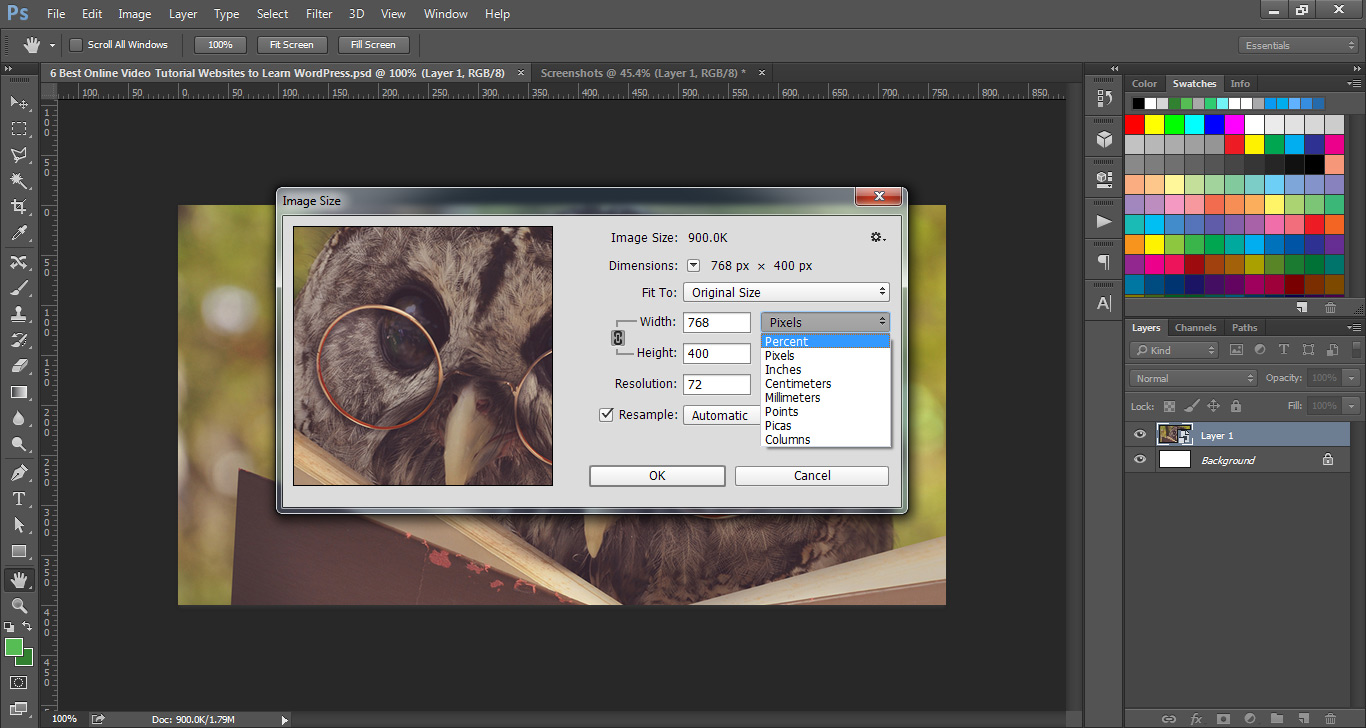
- While in the Pixel Dimensions section, you have to change the unit to percent. Now you must enlarge images in WordPress by 10 percent. Make sure that you check the Constrain Proportions and input the width value as 110. Doing this will automatically change the height of the image to 110 as well.
- Select Bicubic from the re-sampling options. Note that this technique will take some time, but in the end, it will give smoother shifts to your image from one color to the other.
- To complete the transformation, simply click OK.
Perfect Resize
- Select and open the image you wish to enlarge with Photoshop.
- Go to File >> Automate and then choose Perfect Resize.
- Your image will then be opened in the application. You can choose a preset of your own from the menu to the left as well as choose the size of your image with Document Size.
- After that, go to File >> Apply to apply the changes to your image.
Once you save it as a web file, you can then export your image on your website.
Using Gimp
If you’re the frugal kind, then Gimp is just the tool you’re looking for. You won’t get the same quality outcome like that of Perfect Resize, but it is still good enough. In fact, visitors will hardly notice the difference as long as you follow the instructions below:
- Select and open the image that you wish to alter.
- Then select the Image >> Scale Image.
- In the Scale Image window, be sure to click on the chain link icon and see if the right measurements are entered. When you enter the desired image width, the height will automatically adjust accordingly.
- Choose Sinc (Lanczos3) under the Quality section as an Interpolation and then click on the Scale Image button.
After that you can then export this image to your website.
Here’s another useful Visual Watermark tool for your visuals
Using Irfanview
Despite being available on Microsoft-powered systems, Irfanview is one of the more popular image-viewing programs out there. It resizes images and makes them even larger and neater in quality.
- All you have to do is open the image you want to resize on Irfanview and then go to Image >> Resize/Resample.
- You will be taken to the resize image window. From there, you must enter the your preferred image size in the Set Image Size option.
- After that, you must select re-sample under the Size option.
- Choose Lanczos from the filter drop down menu.
- Finally, check the box that is next to ‘Apply Sharpen After Re-sample’.
You can now resize your image and save it to export it to your website.
Conclusion:
Personally, I prefer the Perfect Size software as the ideal tool to enlarge images in WordPress, but each to their own I suppose. If you have any other suggestions for resizing images and maintaining their quality, do let me know in the comments below, or email me if you’d like. I would love to hear your suggestions and feedback.

Create Faster WordPress Websites!
Free eBook on WordPress Performance right in your inbox.


