This Is How You Can Add Google Forms To Your WordPress Website

If you are in need of creating a simple form to collect data from your website visitors, then Google Form is by far the best solution you have. Although, it is not as common as Google Docs or Sheets, but it is equipped with a handful number of features making it a valuable choice for WordPress users around the world.
It is a free-to-use plugin integrated with Google Drive. If you want to create a survey, a poll or a quiz, an event registration or feedback, Google Forms can help you build a basic form fulfilling your utmost requirement. Here are some of its notable features.
- Built-in themes
- Support Custom logos, photos and colors
- Mobile Responsive
- Add Youtube videos
- Ready-to-Use Questions
- Data conversion to Google Sheets
- Supports Customization for Confirmation Page
Today, we are going to educate you on how you can create a Google Form and add it to your WordPress website. So before we begin, make sure that you have an authenticated Gmail account having access to Google Forms.

Creating Your First Form with Google Forms
You can easily find Google Forms in your Google Drive dashboard. Although, if you cannot find it there, please refer to this link https://www.google.com/forms/about/
It will directly navigate you to the About page of Google Forms. Once there, Click on the “Go to Google Forms” button to get started.
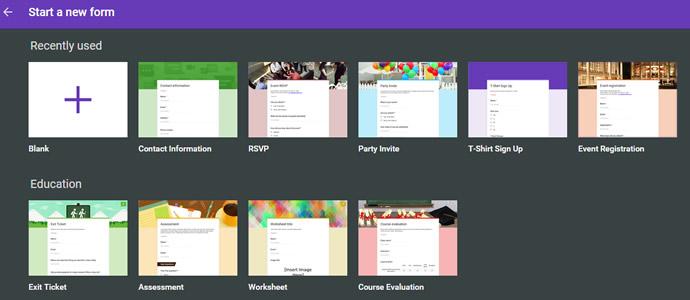
Start Fresh! Create a New Form
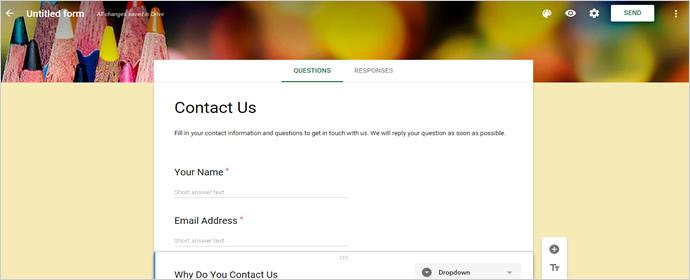
Google Form contains a number of different form templates to select from. Although, if you have any custom form requirements then you can always start with a blank form. My article is basically focused on explaining how you can create a simple contact form and integrate it with WordPress.
Once you hit blank, a new form will be created. You will then have to provide a title, a description, and the first question.
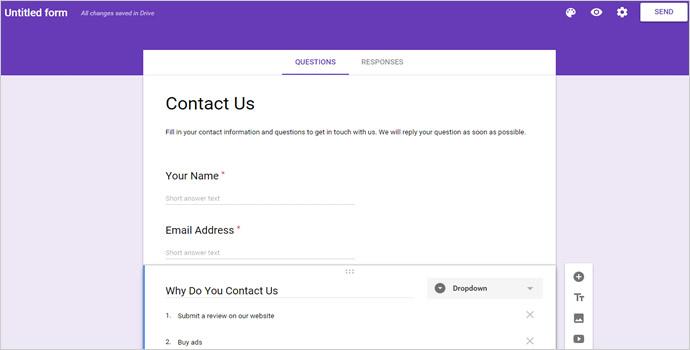
The questions that you will ask can be classified as dropdown, short answers, multiple choices, checkboxes and paragraphs (long answers). The choice is yours to make.
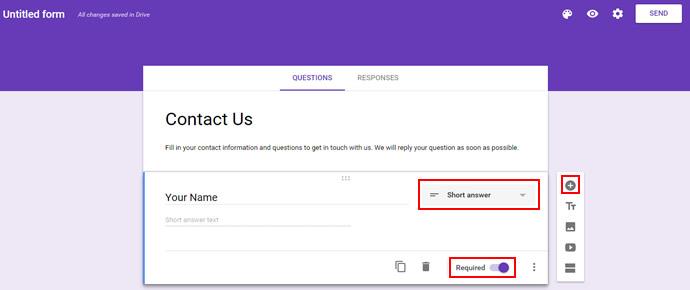
However, for a contact form, the first question is focused on gaining user identity. Hence, we will select “short answer” as the format for our first question. You can also set the requirements of the question by checking/un-checking the corresponding option.
Done with your first question, hit “+” which will eventually allow you to add more questions to your form.
Google Forms contains a toolbar that can allow you to add images, videos and other sections to your form. You can use them wherever you need them within your form.

As soon as you are done with adding all the relevant questions that you require on your form, revise them. Check that all of the questions are available in the right format. You can easily drag and drop questions to arrange them in the right order.
Customizing Form Appearance
You can add custom images and color to your form by clicking “Color Palette” icon. Customization is much easier in Google Forms because it comes with pre-set color schemes. You can select the scheme that you like, refer to the image below.
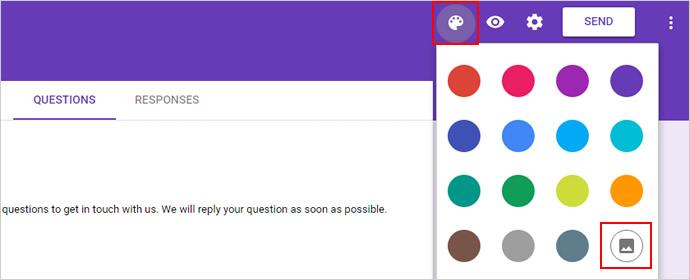
If you are not sure, whether any of the pre-set colors fit your needs, you can select the last image icon. This icon will allow you to select the theme of your choice. A pop-up will automatically appear for you to choose from. These themes are properly categorized so need not to worry while making a choice. Simply, Choose, Upload and Submit.
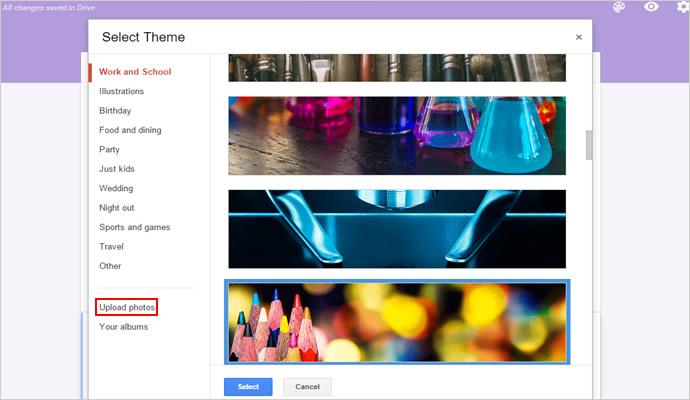
Adding new themes will make a great difference for your Form.
Configuring Form Settings
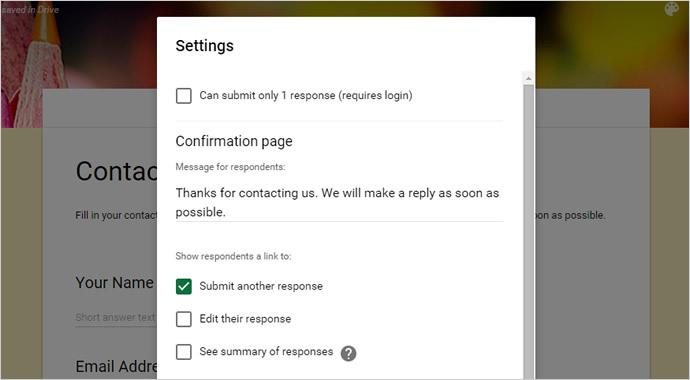
Before you go live with your form on your website, do configure the settings of your form. You can tweak the settings by selecting the settings icon on your newly created form. Settings can enable you to log in, add a custom thank-you message to the confirmation page, select the link shown on the page, etc.
Publishing the Form
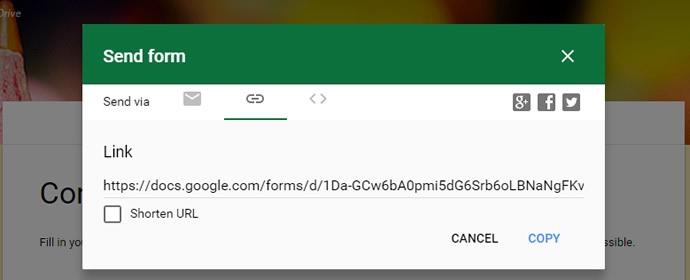
As soon as you are done with the settings, click on the “Send” option available on the upper right corner of the screen. The form will be published. You will now have multiple options to share the form publicly, some of them are listed below
- You can send the form via email
- You can access the form URL and copy/paste it in different social media platforms
- You get the iframe embed code which you can embed in various blog posts
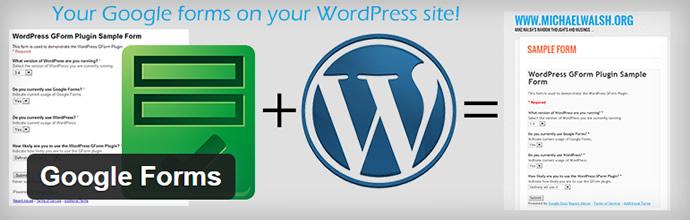
Integrating Google Form With WordPress
You can add Google Forms to your WordPress website by using two methods. Either use the embed code or simply use the plugin available in the WordPress Plugin Repository. However, in both cases, you will need to create the form first, which I have mentioned in the above step.
Method 1: Using Embed Code
As discussed above, you can gain access to the embed code by simply clicking the “Send” option available in your Google form.
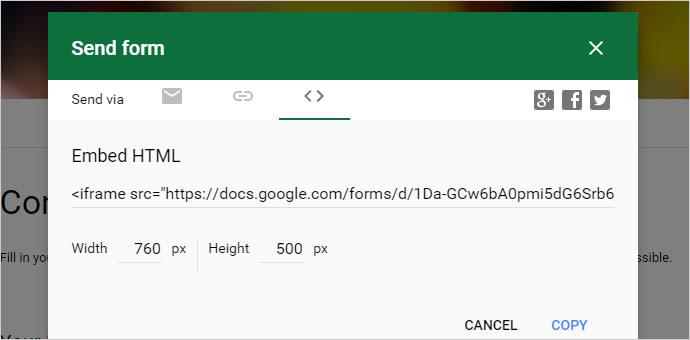
Copy the embed code, go to your WordPress dashboard, create a new post and simply paste the code in the Post Editor of your WordPress website. Hit “Publish” and your Form is accessible to the public on your WordPress website. Modifications and customizations can be done to different parameters by altering borders and form size. Once published, it will look somewhat like this.

This method is the simplest method to integrate Google Forms to your website. The only disadvantage is that it will look different from your website’s original theme because Google Forms follows a specific standard which will not match your theme’s CSS style.
However, if you wish to avoid this issue, our recommendation would be to follow the second method which is adding a Google Form plugin to your WordPress Dashboard.
Method 2: Uploading Form Using Google Form Plugin
The Google Forms plugin is a free plugin. With this plugin you can embed a published form into a WordPress page, post or widget. My personal recommendation lies with using Google Forms plugin because it removes HTML wrappers such as Google branding and other presentation elements standardized by Google. Doing this can help the user fit the form in accordance with the website design.
Moreover, the plugin allows the website owner to manage Forms more efficiently if the user has more than one form on their website. Plus, the plugin has a dashboard of its own allowing users to make edits more easily.
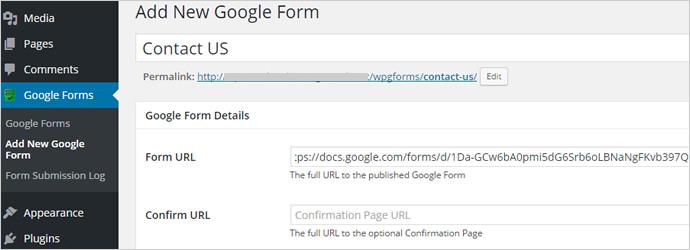
To install the plugin, navigate to your WordPress dashboard and search the required plugin in the search option. Install and Activate the plugin. As soon as the plugin is activated, you will see a new option available in the left admin panel of your form.
Start adding your Google form by simply going to Google Forms > Add New Google Form. You will be directed to a new page where you will have to provide the form title, set permalink, add form URL and then confirm it.
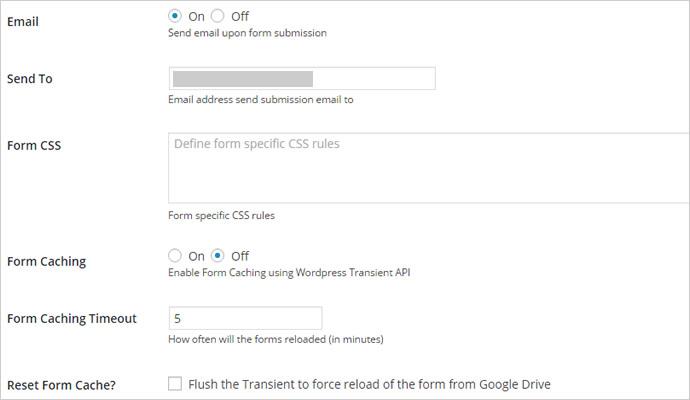
Furthermore, the plugin allows you to add a custom notification such as “Thank You” or “Come Again” information once the form has been submitted.
This plugin further supports email notifications that you can receive as soon as a form is filled by a visitor and submitted. To do so, you will have to enable the feature and add your gmail address so it gets delivered. Plus, additional form CSS and caching are also allowed. Use them whenever you need.
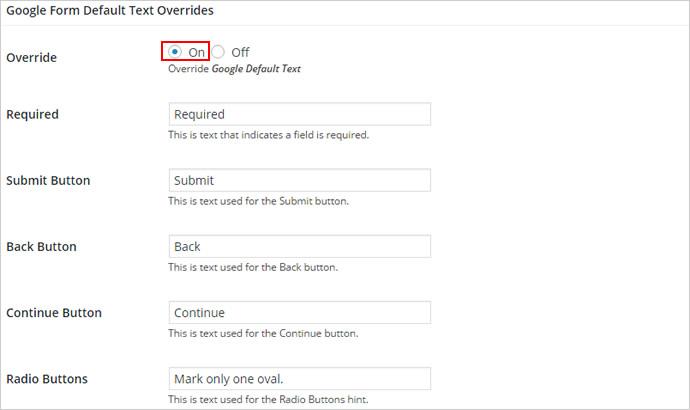
You can add custom text to your form by enabling the text override option and simply add custom texts. Moreover, you can rename fields such as ‘Required’ and other buttons on the form.
On the right side of the page, you can find some additional form options such as:
- Captcha
- Columns
- Column Orders
- Columnize Min Width
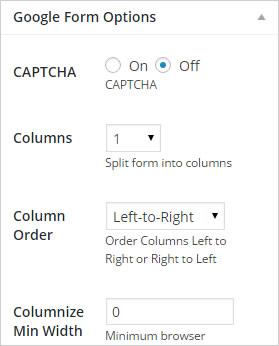
You can set these attributes in accordance with your preference or the requirement of the type of form you are working on.
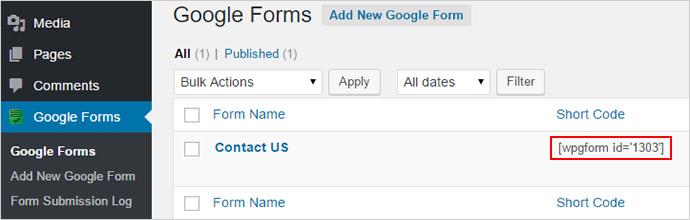
As soon as you publish the form, you can find the form listed under the Forms sub-menu having a shortcode. You can use this shortcode to upload the form in any of your posts by simply copying and pasting it.
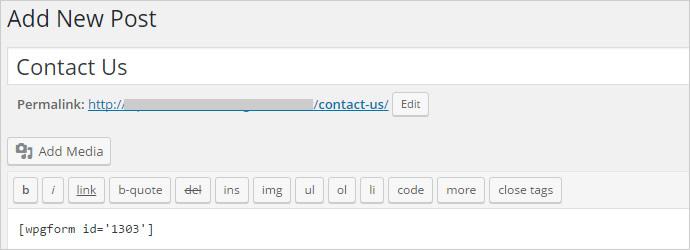
To use this form in any specific WordPress post, page or as a text widget, all you need is the shortcode that you can copy and paste wherever you want the form to be displayed on your website.
After the form is published on a post or page, you can go to the Form Submission Log sub-menu of the plugin to view the logs like timestamp, URL, remote host and HTTP user agent.
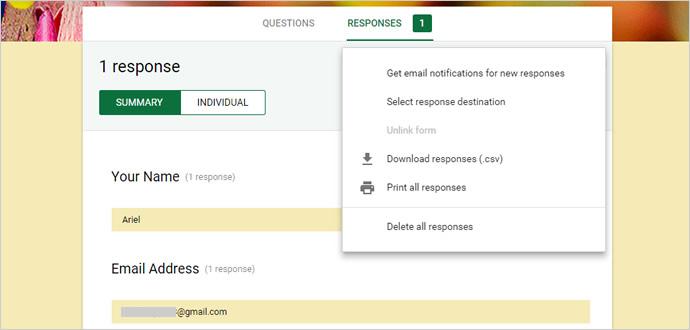
If you want to check the responses on the form, you can go back to the Google Forms web page and check them under the responses section. You can also download the responses as a CSV file or delete it.
So that will be all for the day, hope you are now well aware how Google Forms can be integrated with your WordPress. if couldn’t find the feature that you are looking for on Google Forms, you can also look at more comprehensive google forms alternative with features like online payment collection.

Create Faster WordPress Websites!
Free eBook on WordPress Performance right in your inbox.

Moeez is ‘The’ blogger in charge of WPblog. He loves to interact and learn about WordPress with people in the WordPress community. Outside his work life, Moeez spends time hanging out with his friends, playing Xbox and watching football on the weekends. You can get in touch with him at moeez[at]wpblog.com.