How to Create a Widget Plugin for WordPress

WordPress implements its well known drag-and-drop design capability through widgets. These components were originally imagined to allow users a streamlined way of adding design and structure control elements through WordPress themes.
Widgets add and extend functionality of the WordPress website elements. Users could decide the location of the widgets on the website and add/modify various functionality of the website without adding code to the website.
In this tutorial, I will explain how you could create and customize widget plugin for WordPress.
Plugin Creation
WordPress plugins are code-based components that developers could install and activate on a WordPress website. WordPress fetches all the installed plugins through a loop and lists them on the relevant tab of the WordPress Admin.
Open wp-content/plugins folder. Create a new directory and call it “wpblog”. If you like, you could choose any other name for this folder.
In the wpblog folder, create a new file called “wpblog-plugin.php” and add the following plugin description comments in the file:
|
1 2 3 4 5 6 |
/* Plugin Name: Wpblog Plugin For Widget Plugin URI: https://wpblog.com/ Description: Wpblog plugin for widget Version: 1.0 */ |
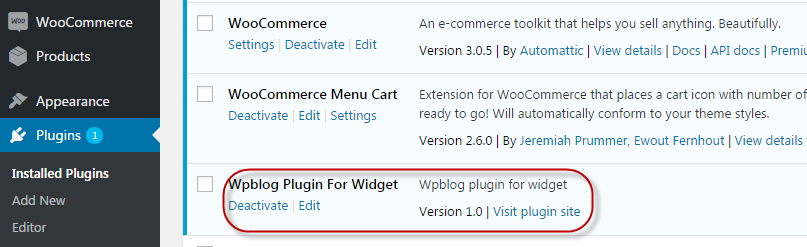
Save your file. At this point, the plugin wpblog-plugin.php file is ready for action! Well, for now, the plugin doesn’t do anything, but WordPress recognizes it. To check this out, go to WordPress Admin and then into the Plugins menu. You could see that the plugin appears in the list of installed plugins:
Widget Creation
Next, I will create widget plugin for WordPress. This widget will be a PHP class extending the core WordPress class WP_Widget.
|
1 2 3 4 5 6 7 8 9 10 11 12 13 14 15 16 17 18 19 20 21 22 23 24 25 26 27 28 29 30 31 32 33 34 35 36 37 38 39 40 41 42 43 44 45 46 47 48 49 50 51 52 |
class wp_blog_plugin extends WP_Widget { function wp_blog_plugin() { parent::WP_Widget(false, $widget_name = __('Wpblog Widget', 'wp_widget_plugin') ); } function form($instance) { if( $instance) { $text = esc_attr($instance['text']); $textarea = esc_textarea($instance['textarea']); } else { $text = ''; $textarea = ''; } ?> <!-- This is the HTML form which appear in the widget area --> <p> <label for="<?php echo $this->get_field_id('text'); ?>"><?php _e('Text:', 'wp_widget_plugin'); ?></label> <input class="widefat" id="<?php echo $this->get_field_id('text'); ?>" name="<?php echo $this->get_field_name('text'); ?>" type="text" value="<?php echo $text; ?>" /> </p> <p> <label for="<?php echo $this->get_field_id('textarea'); ?>"><?php _e('Textarea:', 'wp_widget_plugin'); ?></label> <textarea class="widefat" id="<?php echo $this->get_field_id('textarea'); ?>" name="<?php echo $this->get_field_name('textarea'); ?>"><?php echo $textarea; ?></textarea> </p> <?php } // Update function update the insert value in input field in DB function update($new_instance, $old_instance) { $instance = $old_instance; // Fields which use to insert data in DB $instance['text'] = strip_tags($new_instance['text']); $instance['textarea'] = strip_tags($new_instance['textarea']); return $instance; } // display widget value function widget($args, $instance) { extract( $args ); $text = $instance['text']; $textarea = $instance['textarea']; echo $before_widget; echo '<div class="widget-text wp_widget_plugin_box">'; // Conditional check if( $text ) { echo '<p class="wp_widget_plugin_text">'.$text.'</p>'; } if( $textarea ) { echo '<p class="wp_widget_plugin_textarea">'.$textarea.'</p>'; } echo '</div>'; echo $after_widget; } } // register widget add_action('widgets_init', create_function('', 'return register_widget("wp_blog_plugin");')); |
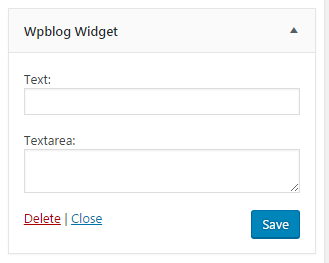
The result of the above (rather lengthy) code is as follows:
Code Explanation
|
1 2 3 |
function wp_blog_plugin() { parent::WP_Widget(false, $widget_name = __('Wpblog Widget', 'wp_widget_plugin') ); } |
The above snippet is part of that constructor that defines the widget’s name. I will only add a single line of code to it.
|
1 2 3 4 5 6 7 8 9 10 11 12 13 14 15 16 17 18 19 20 |
function form($instance) { if( $instance) { $text = esc_attr($instance['text']); $textarea = esc_textarea($instance['textarea']); } else { $text = ''; $textarea = ''; } ?> <!-- This is Html form which appear in wdiget area --> <p> <label for="<?php echo $this->get_field_id('text'); ?>"><?php _e('Text:', 'wp_widget_plugin'); ?></label> <input class="widefat" id="<?php echo $this->get_field_id('text'); ?>" name="<?php echo $this->get_field_name('text'); ?>" type="text" value="<?php echo $text; ?>" /> </p> <p> <label for="<?php echo $this->get_field_id('textarea'); ?>"><?php _e('Textarea:', 'wp_widget_plugin'); ?></label> <textarea class="widefat" id="<?php echo $this->get_field_id('textarea'); ?>" name="<?php echo $this->get_field_name('textarea'); ?>"><?php echo $textarea; ?></textarea> </p> <?php } |
The above code snippet creates the widget in the WordPress administration. This is where the data (that will be displayed on the website) will be entered.
|
1 2 3 4 5 6 7 8 9 10 11 12 13 14 15 16 17 18 19 20 21 22 23 24 |
function update($new_instance, $old_instance) { $instance = $old_instance; // Fields which use to insert data in DB $instance['text'] = strip_tags($new_instance['text']); $instance['textarea'] = strip_tags($new_instance['textarea']); return $instance; } The update() function is really simple, and updates every field. function widget($args, $instance) { extract( $args ); $text = $instance['text']; $textarea = $instance['textarea']; echo $before_widget; echo '<div class="widget-text wp_widget_plugin_box">'; // Conditional check if( $text ) { echo '<p class="wp_widget_plugin_text">'.$text.'</p>'; } if( $textarea ) { echo '<p class="wp_widget_plugin_textarea">'.$textarea.'</p>'; } echo '</div>'; echo $after_widget; } |
The above widget() function outputs the content on the website for the visitors. To further customize this function, you could include CSS classes, and specific tags to match the theme display elements. The code is really simple and all you have to check whether a variable is set. If you fail and then try to print it, you will get an error message.
Conclusion
As you can see, creating and customizing a widget plugin for WordPress is not really complicated. I discussed how to create input fields. In the upcoming posts, I will cover more complex field types and display options.
If you need further help with the code or would like to join the discussion, do leave a comment and I will get back to you ASAP.

Create Faster WordPress Websites!
Free eBook on WordPress Performance right in your inbox.

Moeez is ‘The’ blogger in charge of WPblog. He loves to interact and learn about WordPress with people in the WordPress community. Outside his work life, Moeez spends time hanging out with his friends, playing Xbox and watching football on the weekends. You can get in touch with him at moeez[at]wpblog.com.