WordPress Blogging 101: A Guide On How To Start Your WordPress Blog in 2020
Starting a WordPress blog might seem easy. However, setting up a WordPress powered blog involves several technicalities that could prove to be a challenge for new users. That is why I am here to give you the blogging 101 on how to you can set up your WordPress blog without any difficulty.
WordPress Blogging 101 Guide
In this article, I will show you how to select the right blogging platform, choose a domain name, hosting provider and more as we go on. Following the steps provided below is highly important:
1. How To Setup Blogging Platform?
There are two WordPress blogging platforms; WordPress.com (hosted) and WordPress.org (self-hosted).
When you open up an account with WordPress.com, there is no need to download any software or worry about hosting the website because hosting is automatically included. It is free, but you won’t have any control over your website’s design, upload plugins or even themes.
I recommend you use WordPress.org, because it is free to use, you can customize your website’s design, install plugins and make money from your site.
2. How To Choose a Domain Name?
Your domain name will be your website’s address when users search for you on popular search engines like Google and Yandex or type the address in the browser URL bar. The domain name has to be simple to remember like gamespot.com or logitechgamingsoftware.co for example.
To discover the perfect domain name, use tools like Namemesh, Leandomainsearch, Shopify’s Domain Name Generator and Nameboy. You can purchase a domain name from GoDaddy, NameCheap and HostGator among others. A domain name usually costs around $14.99 a year.
3. How To Choose a Web-Hosting Provider?
A web-hosting provider usually costs $7.99 a month, but Bluehost offers it at about $2.99. With that purchase, you get a free domain name and free site builders. Bluehost started out in 1996, is a WordPress recommended web host and has been a working with WP since 2005.
To get started with Bluehost, go on the home page and click on the ‘Get Started Now’ button. The next screen will show you the plans including Basic, Plus, Prime and Pro.
Plus is the most popular option because it gives you unlimited websites and is great for maintaining several blogs. The Plus plan also lasts you 36 months and has a $200 free marketing offer.
Bluehost has a 30-day money-back guarantee trial period. If you’re not happy with the trial within that period, you can cancel the plan.
Any plan you pick will take you to the same screen afterwards after clicking ‘Select’. In the next screen, you have to enter your website’s domain name. You can also check out the comparison between Cloudways vs Bluehost.
Finally, you need to add your account information and finish purchase. I recommend the Plus plan as it has more options that you can purchase.
You will then receive an email regarding how you can log in to your web hosting control panel (cPanel). The cPanel allows you to manage your emails, support and install WordPress.
Check Top 10 WordPress Hosting Providers
4. How To Install WordPress?
When you open cPanel, you need to scroll down until you reach the website section and then click on the WordPress icon. You will be taken to the Bluehost Marketplace screen. Click on the ‘Get Started’.
In the next screen, select your domain name from the dropdown menu and then click ‘Next’.
Then enter your username, site name and website password. Check all of the boxes and then click ‘Install’.
Once the installation starts, wait for it to finish
By clicking on the link that says ‘Installation Complete’, you will be taken to a screen where you will see your WordPress login URL and password.
Upon completion, your WordPress URL will look like http://xxxxx.com/wp-admin. Click on the WordPress login link to access your dashboard using the creditials you supplied earlier.
5. How To Select a WordPress Theme?
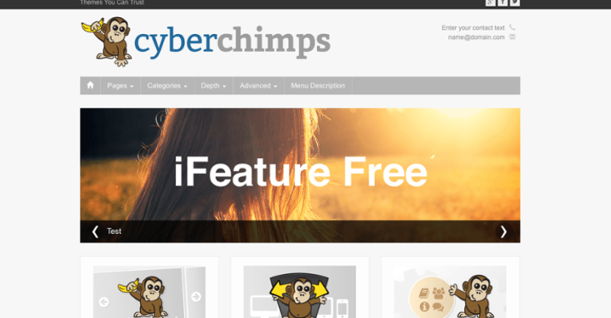
Decide how you want your site to look like by picking a good-looking theme of your choice. When you first visit your blog, you will see a white screen and content written in black font. The default theme is business-ready and has great features.
Go to your WordPress dashboard and click on Appearance » Themes. From the top, click the ‘Add New’ button. You will taken to the WordPress theme directory that contains thousands of free and paid themes. Once you have decided, hover your mouse to that theme, click ‘Install’ and then click on ‘Activate’.
Click on the Customize link under the Appearance menu if you want to customize your theme. You can add your author bio by clicking on ‘Users > Your Profile’ from the admin area then scroll down to ‘Biographical Info’ under ‘Your Profile’.
Check Best WordPress Themes
6. How To Add Plugins and Customizations?
You can add plugins to your blog by clicking on Plugins » Add New from the WordPress admin area. You will be taken to a screen in which you need to type the name of the plugin or functionality you’re looking for in the search bar. Once you find the plugin you want, click the “Install Now” button.
WordPress will then download and install the plugin for you. After your plugin is installed, you will see a message that comes with two links with which you can either activate the plugin or return to the plugin installer. Your plugin will not work on your WordPress blog unless you do not activate it.
Your plugin will now be installed. Then you can customize WordPress and add features such as galleries, sliders, contact forms and about pages.
Check Best WordPress Plugins
7. Security
Updating your WordPress blog is important as it fixes previous security vulnerabilities, adds patches, and introduce new features.
The purpose for backups is to ensure that you can retrieve your website or blog in case of a disaster. Backups also ensure minimal downtime.
You must immediately change your default admin username to avoid brute force attacks. Fortunately, WordPress encourages its users to maintain strong passwords
You need to understand file and folder permission modes as well to change the rules on who can read, write and modify your files. The most common modes are 755 and 644.
The 644 mode allows only the owner to read and write any file or directory whereas everyone else can just read them. The 755 mode is used for folders as it allows all users to change into that directory.
Check 30 Proven Tips to Secure Your WordPress Website
8. How To Start Writing Your Blog Post?
Now you’re ready to write your first blog post. From your WordPress dashboard, click on the ‘Posts » Add New’ option and you will be taken to the ‘Add New Post’ screen.
You are free to write whatever your blog niche is all about.
Once you have written what you want, click on the ‘Publish’ button on the right side. Your post will be seen by anyone from around the world.
To add images, click the ‘Add Media’ button between the title and the content field. A popup will show up allow you to select an image, audio or video that you want to upload to your WordPress post.
You can sort your posts into tags and categories from the meta boxes on the right hand side of the editor area under the publish meta box. Organizing your posts into various categories helps users find your content faster as well as increase your SEO.
Frequently Asked Questions
Q1. How much does it cost to set up a blog?
This is how much it will cost you to launch your WordPress website
| Domain | $12 |
| Hosting | $10 |
| Theme | $15 |
| Plugins | |
| Yoast | $89 |
| Akismet | $5 |
| WProcket | $39 |
| WordFence | $99 |
| Total | $269 |
Q2. How do you make money from blogging?
WordAds
WordAds is the WordPress solution for ads on your blog. Any WordPress user can use it but you need to apply to get this service on your blog. Once approved, ads would appear on your website and you could start earning through your blog.
Affiliate Marketing
Many people use affiliate marketing to earn good sums of money from their blogs. The challenge is to induce your visitors to buy or use a product or a service. Once they make the purchase, you get a commission.
Sponsored Posts and Reviews
In the online world, you will find many advertisers who want to sponsor posts on your website. The traffic and audience of your blog are two fundamental criteria for post sponsorship.
Read full article on All The Ways You Can Get Rich Using WordPress
Q3. How to add rss to your WordPress blog ?
Adding RSS feed to your WordPress blog is simple. Just install a RSS feed plugin and you will have a RSS feed ready for your blog.
Check out 9 Best WordPress RSS Feed Plugins 2019 for a full list of the best RSS feed plugin.
Q4. How can I monetize my blog with AdSense?
To earn good money from AdSense, you first need enough traffic on your blog. The more traffic you have, the better the chances for an increased revenue.
Also, make sure that you have a AdSense optimized WordPress theme. Check out the full list of themes here: Best Adsense Optimized WordPress Themes
The next step is to create your AdSense account and connect your site to it. Your site will start showing ads and you will start earning on per click basis.
Q5. How to start a blog for free?
First you have to choose a blogging platform, like WordPress. Select a domain name and your hosting plan. Opt for a free theme and plugins from the WordPress repository. The only cost you will incur here is for the domain name and the hosting service.
Conclusion
Be sure to follow all of the steps above to ensure you have achieved your objective of writing your first blog post. If you feel that I have missed out on something or would like to add, then let me know in the comments below. If you want more control over author biography, please check the Simple Author Box plugin for WordPress
Create Faster WordPress Websites!
Free eBook on WordPress Performance right in your inbox.
