Top 10 Hidden Features of WordPress
There is a reason why WordPress is considered one of the most widely recognized Content Management System in the world. So when we call WordPress, a flexible CMS, what is it that we intend to spotlight at?
It is a fact that WordPress is not only limited to being a blogging tool but it has transformed itself into an incredibly powerful and user-friendly publishing CMS over the years. With WordPress, you can now create almost any kind of website using different plugins. Over 27,000 different plugins are currently available in the WordPress repository.
Do you realize the significance of such numbers? You have a plugin available to create almost anything you want through WordPress. From business websites to online web stores, you name it and WordPress will make it possible for you.
10 Hidden Features of WordPress
Even though WordPress offers you vast platform functionality, users still tend to educate themselves on the basics and hover around at the surface. What they don’t know is that WordPress, with its application hosting capabilities, has some hidden features that can help them take full advantage of the web application.
Here is a list of underused WordPress features that you may not know about… Let’s find out.
Screen Options

When you create a post in WordPress, it is archived in your WordPress database. Multiple options can help you quickly find a particular post from your All Post WordPress repository. Screen options can be commonly identified at the top right corner of your screen. It contains a handful number of options to check-on, such as,
Author – For specifying the author of the posts.
Categories – For showing categories on your posts.
Tags – For showing tag keywords on the posts.
Comment – For enabling comment on the posts.
Date – To display the date on which posts are created.
SEO – To display SEO ratings.
Readability – To display readability ratings.
SEO Title – To display SEO Title.
Meta Description – To display meta description.
Focus Keyword – To display focus keywords.
Sticky Posts
If you want to give your post an extended exposure, then a sticky post is just the right option for your WordPress website. It is one of the hidden features of WordPress that enables you to add your post on the homepage of your website. You can enable sticky post on any specific post by just editing your post.
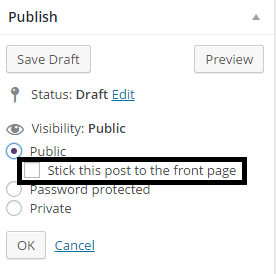
Navigate to the “Edit” link, and it will take you to the Post Editor of that specific post. In your Post Publish Widget, edit Visibility option which is by default set to Public. Here you will find a checkbox termed as “Stick this post to the front page”. All you have to do is check and Publish it. You can now see this post visible on the top of your homepage.
Post Revisions
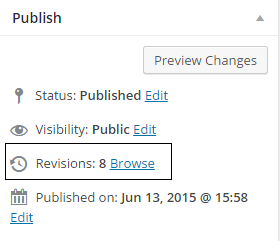
Just underneath the visibility option is the option for Post Revisions. Post Revisions can help you keep a track record of previous versions of your post so you can compare it to the current version. In order to access and check the earlier versions of your Post, just click the number of revisions displayed in your Publishing widget.
Although keeping a track of revisions on your post is a good practice, it can seemingly result in consuming a lot of space in your database. You can disable the revision feature from your WordPress; however, it will be better if you keep it on but limit the number of revisions that you can perform on a single post.
In order to do that, you need to access your “wp-config.php” file and add the following code to it.
define(‘WP_POST_REVISIONS’, 2);//You can use any number instead of 2
Scheduled Posts
You have worked on a Post, but you have exceeded the limit of articles to be sent on your website. Do you wish to publish a pre-created post on a future date? Don’t worry WordPress has a solution for everything.
You can schedule your post on WordPress, so it automatically publishes it. To schedule your WordPress post, all you have to do is input the month, day and time for the post you want to publish at a later date. You can find the publish option in the publishing widget which is set to immediately by default
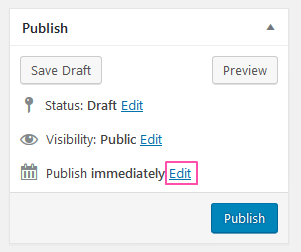
In the publishing widget, right beneath the visibility option, you will find the publish option which is set to immediately by default. You can edit it from accessing this option from there.
Inline Linking
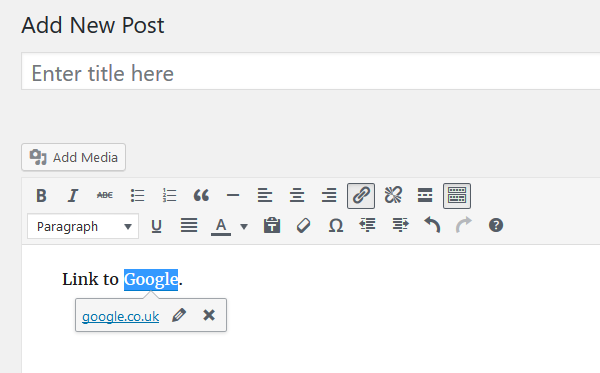
Although this feature was released in the WordPress 4.5, it’s utilization is not that commonly observed among new bloggers compared to its importance. With Inline Linking option available at WordPress Text Editor, you can now directly apply linking and unlinking on a specific content or image with just a single click. Just highlight the text you want to link and add a link directly to your post.
Favicon
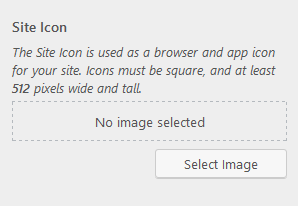
Usually, multiple readers have a habit of multitasking. They open up a number of tabs in a single browser. When such a thing happens, readers tend to specify different tabs through their favicons. Favicons are the small square logo symbols that can be found on the title bar.
WordPress makes adding a favicon to your website quite easy. All you have to do is add a favicon to your WordPress website by just navigating generally to Customizer – Appearance > Customizer – making your way to the Site Identity Tab. Otherwise, in most cases where you are using paid themes, you will have to find the Favicon option from the theme options panel. You can choose any image in your media library to display as your favicon and the recommended size for Favicon is 16×16.
Embed Links and Videos.
Embedding is a hidden feature that most WordPress users don’t know about. If you have heard it for the first time, don’t worry I am going to tell you all about it. Embedding media is far more beneficial than just adding it into your content. Embedding automatically updates the content if it is updated at the source.
For example, if you want to embed a Tweet into your content, you will have to find the embed link of that tweet first. Here’s how to do it:
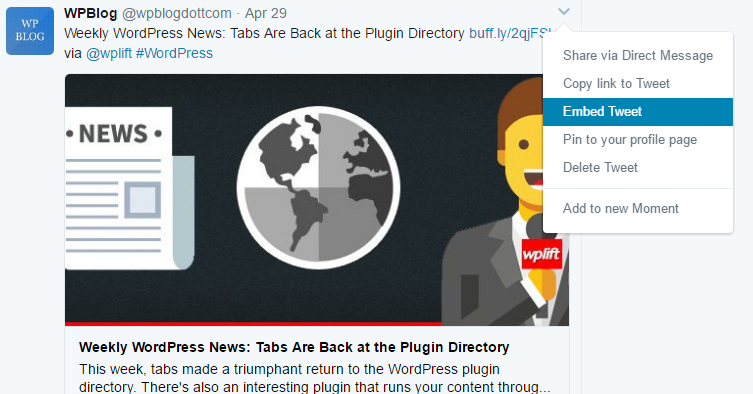
After clicking on the embed tweet option. You will see a new window open.
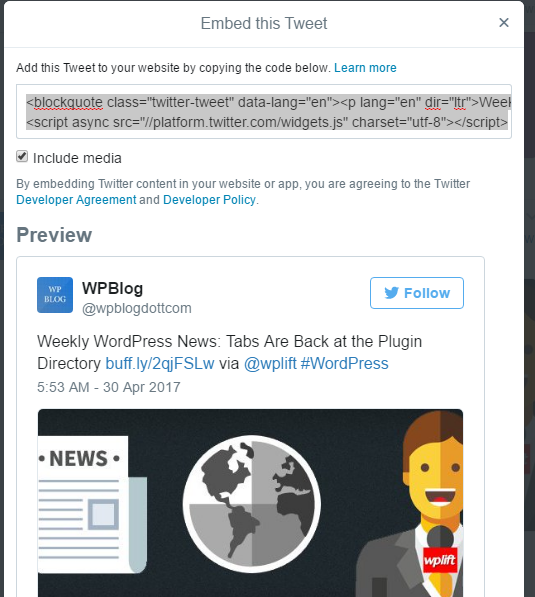
The highlighted code is the embed code. Simply go to the ‘Add Media’ option on your WordPress admin panel, click on ‘Add URL’ and paste the code there. Now you have embedded a tweet in your article. You can embed other media as well by simply copying the embed code.
Shortcuts
Everyone loves shortcuts! Editing your content is already a hefty task and it can take a lot of time from your busy schedule. So I am going to tell you some nifty shortcuts which can save you some time. WordPress users don’t normally use these shortcuts because they are not aware of them.
Use * or – to start an unordered list
Use 1. or 1) to start an ordered list
Use # to format the text into h1
Use ## to format the text into h2
Use ### to format the text into h3, and so on
Use > to format the text into blockquote
These are just a few. You can check out the entire list of cheeky shortcuts by clicking on question mark on your post editor.

Distraction Free Mode
As a writer, I prefer a distraction-free interface to write. I sometimes write on the Microsoft Notepad because it’s so clean. If you are a writer as well and share the same sympathies as mine, WordPress has a solution for you. A simple, yet hidden feature that allows writers to write in with zero distraction so that they can focus on their content.
Here’s how you can access it. Simply open the editor and click on the full screen icon on the right.
Split Posts
Detailed, long form posts, as informative as they are, can spoil user-experience because of their length. The infinite scrolling can put off a reader and he might bounce from your website. WordPress has a solution for this too with another hidden feature which allows you to split a single post into multiple pages. This will improve a user’s experience on your website and decrease your bounce rate.
This is how can pull it off;Simply add the code <!–nextpage–> wherever you want to split your content. You can split your content into as many pages as you want.
With that, we conclude our article on 6Hidden features of WordPress. There are many other hidden features in WordPress on which we will shed light in the future; however, a few are discussed above. If you like this article and you find it informative, do leave a comment in the provided section below.

Create Faster WordPress Websites!
Free eBook on WordPress Performance right in your inbox.

Moeez is ‘The’ blogger in charge of WPblog. He loves to interact and learn about WordPress with people in the WordPress community. Outside his work life, Moeez spends time hanging out with his friends, playing Xbox and watching football on the weekends. You can get in touch with him at moeez[at]wpblog.com.